Introduction
In complex 3D environments, rendering every object in the scene can be demanding, leading to slowdowns and reduced performance, especially in large or detailed levels. Occlusion Culling is a technique that improves performance by only rendering objects visible to the camera, reducing the workload on the CPU and GPU. This post will guide you through the process of setting up Occlusion Culling in Unity, demonstrating its benefits with step-by-step instructions and comparison screenshots.
Step 1: Setting Objects as Occluders
In Occlusion Culling, objects that block the view of other objects are known as occluders. For example, walls, buildings, or large terrain pieces can serve as occluders, hiding objects behind them and saving on rendering costs. To set an object as an occluder:
- Select the object
- In the Inspector, enable the Static checkbox.
- Under Static Options, ensure that Occluder Static is checked
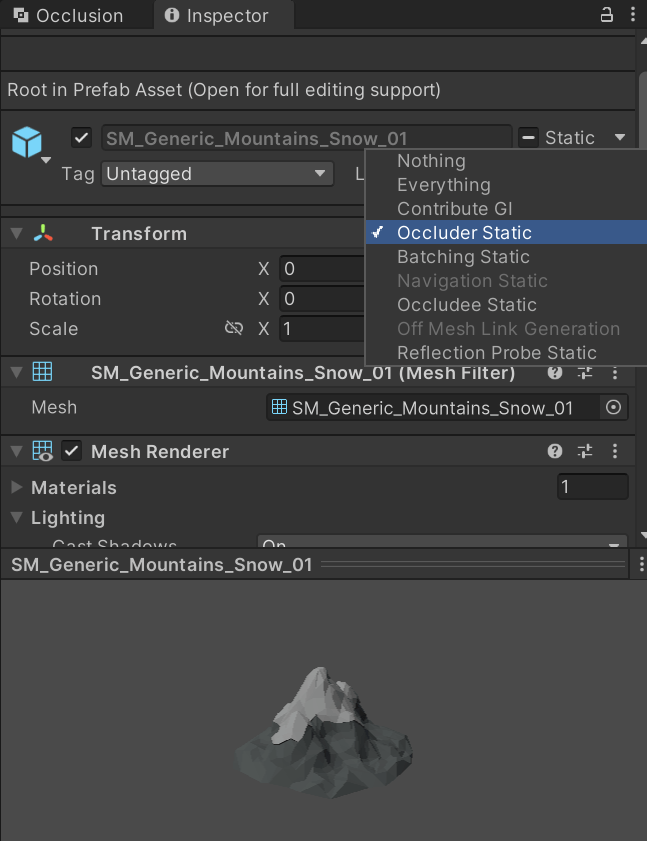
Setting key objects as occluders is essential for Occlusion Culling to take effect, as it enables Unity to detect which objects should block others from rendering.
Step 2: Setting Objects as Occludees
Objects that can be hidden by occluders are called occludees. These might be smaller props, interior elements, or details within buildings. To set an object as an occludee:
- Select the occludee object
- In the Inspector, enable the Static checkbox.
- Ensure that Occludee Static is checked under Static Options.
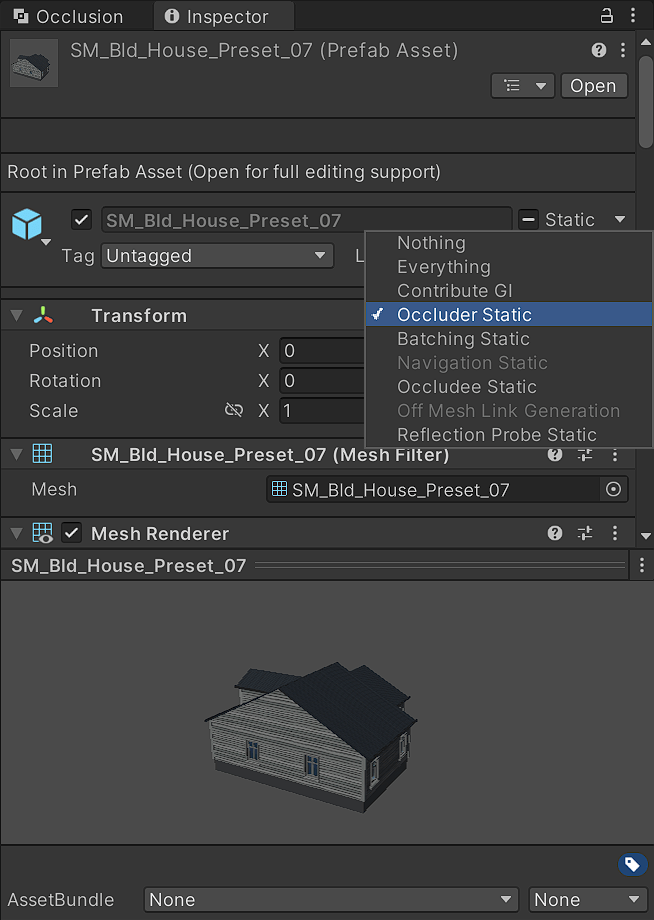
By setting objects as occludees, you allow Unity to hide them when they are out of view, helping reduce rendering costs significantly.
Step 3: Enabling Occlusion Culling and Baking Occlusion Data
Once you’ve designated objects as occluders and occludees, you need to enable Occlusion Culling on the camera itself and bake the occlusion data to apply these settings effectively.
- Enable Occlusion Culling on the Camera:
- Select the Main Camera
- In the Inspector, locate the Camera component.
- Ensure that the Occlusion Culling checkbox is checked. This setting tells Unity to use occlusion data during rendering, hiding any objects that are not visible to the camera.
- Open the Occlusion Culling window by navigating to
Window > Rendering > Occlusion Culling. - In the Bake tab, adjust the Smallest Occluder and Smallest Hole values based on the size of your occluders and gaps in your scene.
- Smallest Occluder: Defines the minimum size an object must have to function as an occluder.
- Smallest Hole: Specifies the smallest gap size Unity will recognize. Set this based on your scene’s scale to avoid small gaps causing unnecessary rendering.
- Click Bake to generate the occlusion data.
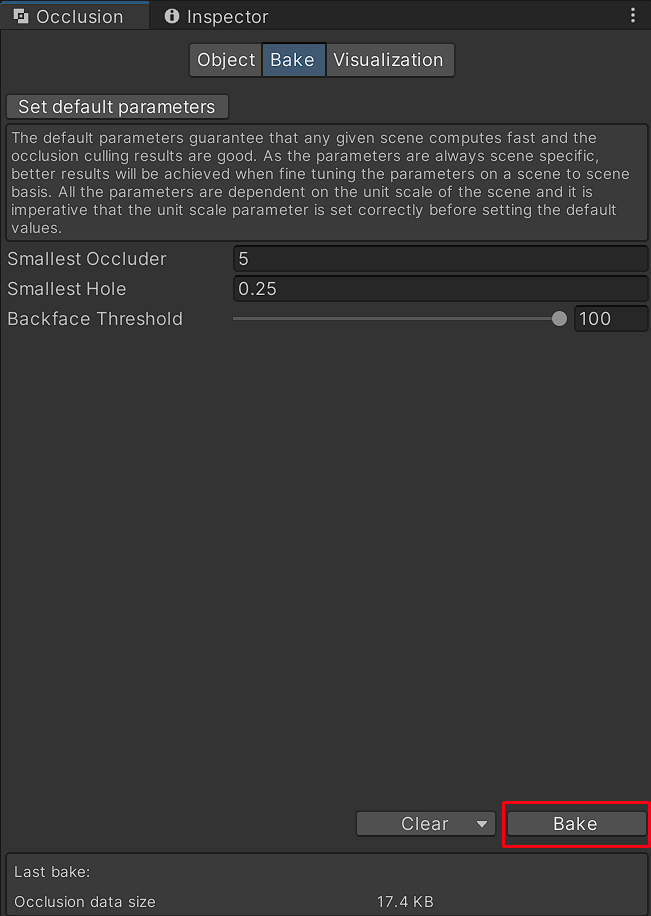
Baking can take some time, depending on the complexity of the scene. Once completed, Occlusion Culling will be active, enabling Unity to hide objects outside the camera’s view.
Step 4: Visualizing Occlusion Culling
To see Occlusion Culling in action, switch to the Visualization tab in the Occlusion Culling window and select the main camera. In the Scene View, you’ll notice that only objects visible to the camera are rendered, while occluded objects are culled and hidden.
- Without Occlusion Culling: All objects are rendered, including those out of view or behind other objects.
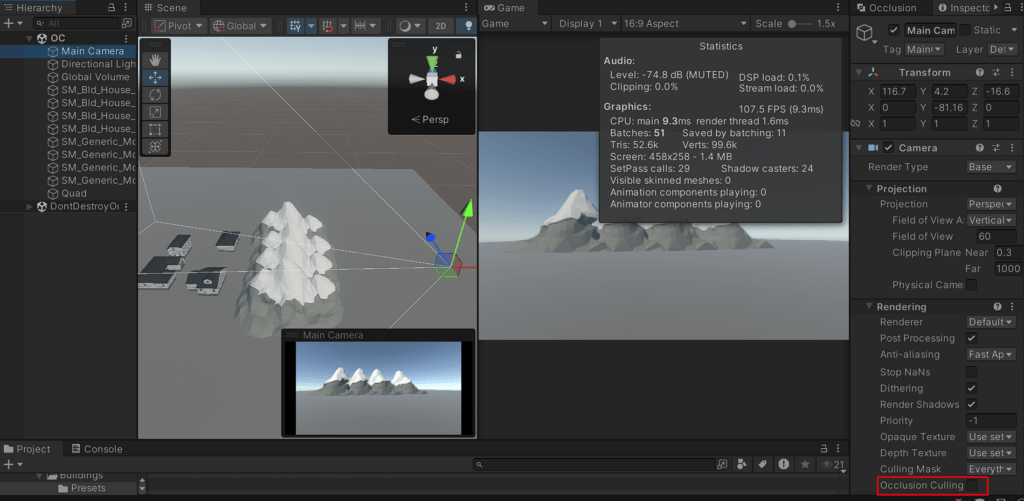
- With Occlusion Culling: Only visible objects are rendered, significantly reducing the rendering workload and improving performance.
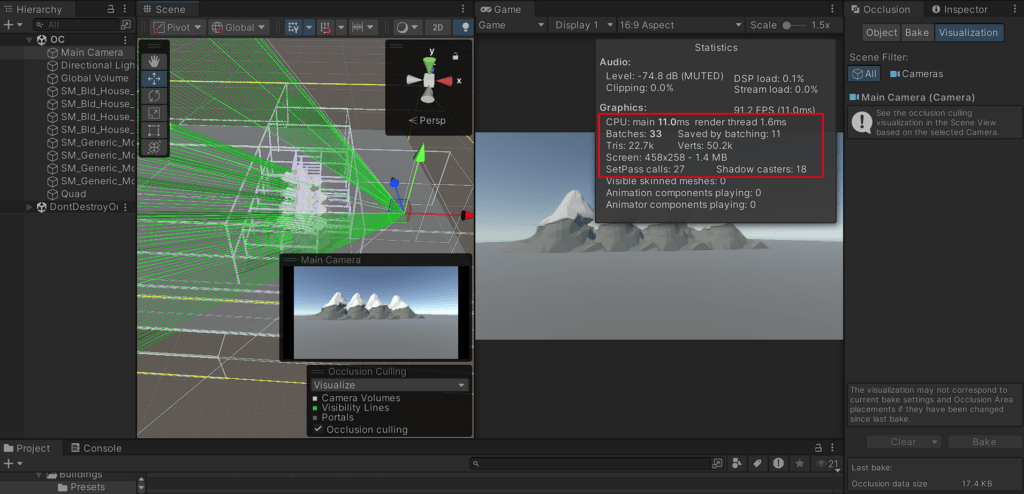
In the screenshot comparison, notice that objects behind walls or outside the camera’s view are no longer rendered, highlighting the efficiency gained by Occlusion Culling.
Conclusion
Occlusion Culling is a powerful optimization tool in Unity, particularly effective in scenes with dense object placement and limited visibility. By setting up occluders and occludees, you can streamline rendering, reducing both CPU and GPU load, which ultimately improves frame rates and gameplay smoothness. Following these steps and adjusting the Bake settings based on your scene size and complexity can make a noticeable difference in your project’s performance.